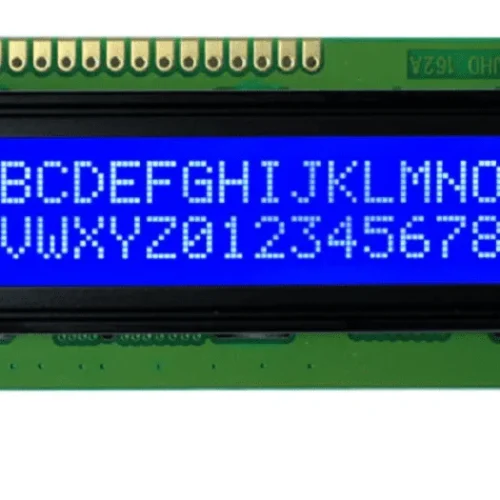
Description
🔧 IIC/I2C LCD Adapter Module – Serial Interface Board for Character LCD Displays
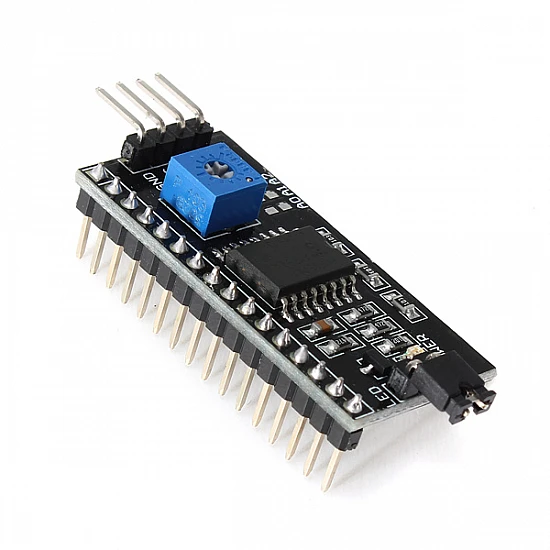
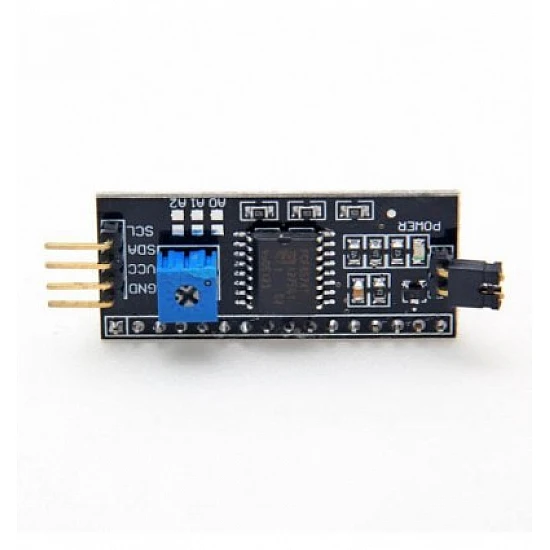
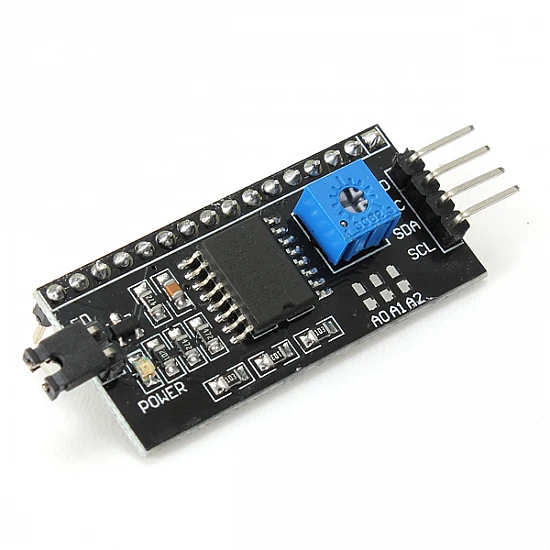
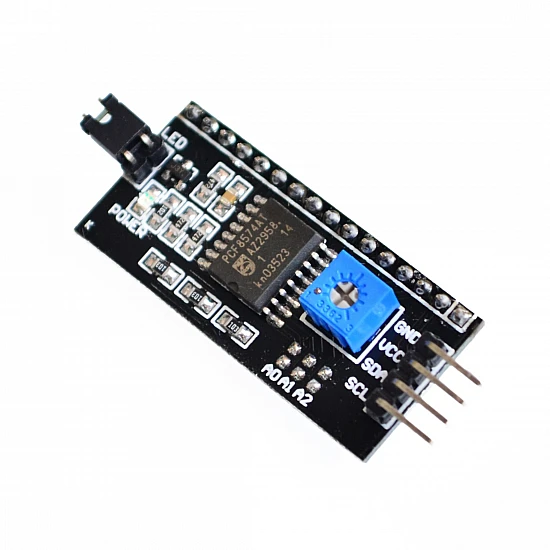
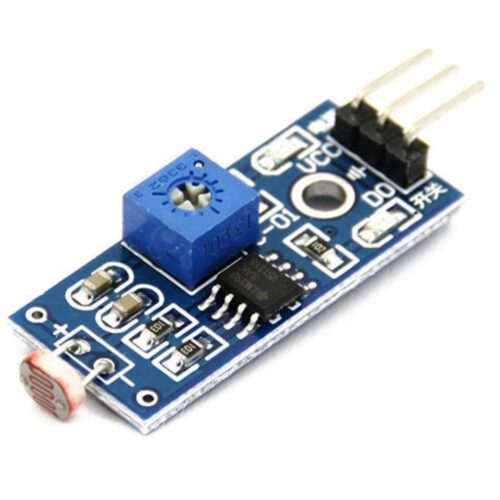
The IIC/I2C LCD Adapter Module is a compact interface board that converts standard 16-pin parallel LCD displays (16×2, 16×4, 20×2, 20×4) to simple 2-wire I2C communication. Based on the PCF8574 I/O expander chip, this adapter drastically simplifies wiring by reducing connections from 6-16 wires to just 4 wires (VCC, GND, SDA, SCL). Featuring adjustable I2C address via jumpers, built-in contrast potentiometer, backlight control jumper, and plug-and-play compatibility with Arduino, Raspberry Pi, and other microcontrollers. Perfect for GPIO-limited projects, clean builds, prototyping boards, multi-LCD setups, and hobbyists seeking simplified LCD integration without sacrificing functionality.
✨ Key Highlights
- 🔌 Only 4 Wires Needed – VCC, GND, SDA, SCL (vs 6-16 parallel)
- 📡 I2C Interface – Standard serial communication protocol
- 💻 PCF8574 Chip – Reliable I/O expander IC
- 📊 Adjustable Address – 0x20-0x27 or 0x38-0x3F via jumpers
- 🔧 Built-in Potentiometer – Onboard contrast adjustment
- 💡 Backlight Control – Jumper to enable/disable backlight
- ⚡ 5V Operation – Standard 5V power supply
- 🔌 Pre-Soldered Header – Direct plug onto LCD (most models)
- 📦 Universal Compatibility – Works with 16×2, 16×4, 20×2, 20×4 LCDs
- 💰 Very Affordable – Only $2-4, huge convenience gain
📊 Technical Specifications
| 💻 Main IC |
PCF8574T or PCF8574AT I/O expander |
| 📡 Interface |
I2C (IIC) – Two Wire Interface (TWI) |
| ⚡ Operating Voltage |
5V DC (some support 3.3V-5V) |
| 🔋 Current Draw |
~10-20mA (module only, excludes LCD backlight) |
| 📊 I2C Speed |
Standard (100kHz) or Fast (400kHz) |
| 🔌 Default Address |
0x27 (PCF8574T) or 0x3F (PCF8574AT) |
| 📡 Address Range |
0x20-0x27 (T) or 0x38-0x3F (AT) |
| 🔧 Address Jumpers |
A0, A1, A2 solder pads (3-bit addressing) |
| 💡 Backlight Control |
Jumper or transistor control (varies by model) |
| 📊 Contrast Adjust |
Built-in 10kΩ potentiometer |
| 📏 Module Size |
~42×19mm (varies slightly) |
| ⚖️ Weight |
~3-5 grams |
| 🔌 Output Pins |
16-pin male header to LCD |
| 🔌 Input Pins |
4-pin connector (VCC, GND, SDA, SCL) |
🔌 Pin Configuration
| Input Pins (4-pin) |
Connection |
Notes |
| GND |
Ground (0V) |
Connect to microcontroller GND |
| VCC |
+5V Power |
Power supply (5V DC) |
| SDA |
I2C Data |
Connect to microcontroller SDA pin |
| SCL |
I2C Clock |
Connect to microcontroller SCL pin |
| Output Pins (16-pin) |
Connection |
Notes |
| 16-pin male header |
Plugs directly into LCD |
All 16 LCD pins connected automatically |
| Contrast pot |
Controls LCD Pin 3 (V0) |
Onboard adjustment |
| Backlight jumper |
Controls LCD Pin 15/16 |
Remove to disable backlight |
🎯 Perfect For
- 🤖 GPIO-Limited Projects – Save 4+ valuable GPIO pins
- 📦 Clean Builds – Minimal wiring, professional appearance
- 🔬 Breadboard Prototyping – Fewer jumper wires, less clutter
- 📊 Multiple LCD Setups – Control up to 8 LCDs on one I2C bus
- 🏠 Home Automation – Multiple room displays on same bus
- ⚙️ Arduino Projects – Uno only has limited pins, I2C helps
- 🎓 Educational Kits – Easier for beginners to wire
- 💻 Raspberry Pi – I2C is native, very easy integration
🆚 Parallel LCD vs I2C Module Comparison
| Feature |
Standard Parallel LCD |
LCD with I2C Module |
| Wiring Complexity |
⚠️ 6-16 wires required |
✅ Only 4 wires (VCC, GND, SDA, SCL) |
| GPIO Pins Used |
⚠️ 6 pins minimum (4-bit mode) |
✅ Only 2 pins (SDA, SCL) |
| Update Speed |
✅ Faster (direct parallel) |
⚠️ Slightly slower (serial conversion) |
| Contrast Adjust |
⚠️ External potentiometer needed |
✅ Built-in pot on module |
| Multiple LCDs |
⚠️ Needs 6 pins per LCD |
✅ Up to 8 LCDs on same bus |
| Setup Difficulty |
⚠️ More complex wiring |
✅ Simple 4-wire connection |
| Cost |
✅ $3-15 (LCD only) |
💰 +$2-4 for I2C module |
| Best For |
Speed-critical applications |
✅ Most projects, clean builds |
✅ Key Advantages
- 🔌 Massive Wiring Reduction – From 6-16 wires down to 4 wires
- 📊 Save GPIO Pins – Frees up 4+ pins for other sensors
- 📦 Cleaner Builds – Much less wire clutter, professional look
- 🔧 Built-in Contrast – No separate potentiometer needed
- 💻 Easy Programming – Simple library (LiquidCrystal_I2C)
- 📡 Multiple LCDs – Control up to 8 displays on one I2C bus
- 🔌 Plug and Play – Just plug onto LCD header pins
- 💰 Very Affordable – Only $2-4 extra cost, huge benefit
- 🛡️ Reliable – PCF8574 is proven, stable chip
- 🔧 Address Selection – Jumpers allow custom I2C address
⚠️ Important Limitations
- 🔄 Slightly Slower – I2C serial vs parallel (rarely noticeable)
- 💰 Extra Cost – Adds $2-4 to LCD price
- 📏 Extra Size – Module adds ~5mm to LCD thickness
- ⚡ 5V Typically – Most require 5V (some work with 3.3V)
- 🔌 I2C Bus Sharing – Shares bus with other I2C devices
- 📊 Address Conflicts – Must avoid duplicate addresses on same bus
- 🔧 Soldering May Be Needed – Some kits require header soldering
🔧 Arduino Connection Guide
| I2C Module Pin |
Arduino Uno |
Arduino Mega |
ESP32 |
| GND |
GND |
GND |
GND |
| VCC |
5V |
5V |
5V (or 3.3V if compatible) |
| SDA |
A4 |
Pin 20 (SDA) |
GPIO 21 (default) |
| SCL |
A5 |
Pin 21 (SCL) |
GPIO 22 (default) |
💻 Arduino Code Example
| Basic I2C LCD Example |
#include <Wire.h>
#include <LiquidCrystal_I2C.h>
// Initialize LCD: address, columns, rows
LiquidCrystal_I2C lcd(0x27, 16, 2);
void setup() {
lcd.init(); // Initialize LCD
lcd.backlight(); // Turn on backlight
lcd.setCursor(0, 0);
lcd.print(“Hello, World!”);
lcd.setCursor(0, 1);
lcd.print(“I2C LCD Ready!”);
}
void loop() {
lcd.setCursor(0, 1);
lcd.print(“Time: “);
lcd.print(millis() / 1000);
lcd.print(“s “);
delay(1000);
}
|
🔍 Finding I2C Address (Scanner)
| I2C Address Scanner Sketch |
|
#include <Wire.h>
void setup() {
Serial.begin(9600);
Wire.begin();
Serial.println(“I2C Scanner”);
}
void loop() {
for(byte addr = 1; addr < 127; addr++) {
Wire.beginTransmission(addr);
if(Wire.endTransmission() == 0) {
Serial.print(“Found at 0x”);
if(addr < 16) Serial.print("0");
Serial.println(addr, HEX);
}
}
delay(5000);
}
|
📊 I2C Address Configuration
| Chip Type |
Base Address |
Address Range |
| PCF8574T |
0x27 (default) |
0x20 – 0x27 |
| PCF8574AT |
0x3F (default) |
0x38 – 0x3F |
| Jumper Config |
A2 |
A1 |
A0 |
Address Offset |
| All Open (default) |
Open |
Open |
Open |
+7 (0x27 or 0x3F) |
| A0 Closed |
Open |
Open |
Closed |
+6 (0x26 or 0x3E) |
| A1 Closed |
Open |
Closed |
Open |
+5 (0x25 or 0x3D) |
| A0+A1 Closed |
Open |
Closed |
Closed |
+4 (0x24 or 0x3C) |
| All Closed |
Closed |
Closed |
Closed |
+0 (0x20 or 0x38) |
🔍 Troubleshooting
| LCD Not Detected |
Run I2C scanner, check SDA/SCL wiring, verify 5V power |
| Blank Screen |
Adjust contrast pot on I2C module (turn slowly) |
| White Boxes Only |
Code not running or wrong I2C address in code |
| Garbled Text |
Check I2C address (try 0x27 and 0x3F), verify connections |
| No Backlight |
Check backlight jumper on module, verify it’s installed |
| Address Conflict |
Change address using A0/A1/A2 solder jumpers |
| Flickering Display |
Poor power supply, add capacitor (100µF) near module |
| Wrong Library |
Use LiquidCrystal_I2C not LiquidCrystal library |
💡 Pro Tips
- 🔍 Always Run Scanner First – Verify I2C address before coding
- 🔧 Adjust Contrast Carefully – Turn pot slowly, sweet spot is narrow
- 📊 Multiple LCDs – Use different addresses for each LCD (A0/A1/A2 jumpers)
- ⚡ Stable Power – Use capacitor (100µF) if power supply is noisy
- 🔌 Short I2C Wires – Keep SDA/SCL wires under 1 meter for reliability
- 💻 Install Library – Use Arduino Library Manager: “LiquidCrystal I2C”
- 🔋 Power from Arduino – I2C module draws minimal current, safe to power from 5V pin
- 🔧 Pre-Solder Headers – Buy modules with headers pre-soldered for ease
📦 Installing Arduino Library
| Method 1: Library Manager |
Arduino IDE → Sketch → Include Library → Manage Libraries → Search “LiquidCrystal I2C” → Install |
| Method 2: ZIP File |
Download from GitHub → Sketch → Include Library → Add .ZIP Library |
| Popular Library |
By Frank de Brabander (most common) |
| Alternative |
NewLiquidCrystal library (advanced features) |
🔧 Backlight Control
| lcd.backlight() |
Turn backlight ON |
| lcd.noBacklight() |
Turn backlight OFF |
| Hardware Jumper |
Remove jumper to permanently disable backlight |
| Power Saving |
Use noBacklight() when idle (saves 50-150mA) |
📦 Package Contents (Typical)
- ✅ 1x I2C LCD Adapter Module (PCF8574 based)
- ✅ 16-pin male header (usually pre-soldered to module)
- ✅ Built-in contrast potentiometer
- ✅ Backlight control jumper
- ✅ A0/A1/A2 address selection pads
- ⚠️ Note: 4-pin connector cable may be included (varies)
- ⚠️ Note: LCD display sold separately
- ⚠️ Note: Jumper wires not included
- ⚠️ Note: Some kits require header soldering
🔧 Compatible LCD Sizes
- ✅ 16×2 LCD – Most common, perfect fit
- ✅ 16×4 LCD – 4-line display, same interface
- ✅ 20×2 LCD – Wider 2-line display
- ✅ 20×4 LCD – Maximum capacity, 80 characters
- ✅ 8×2 LCD – Compact displays
- ⚠️ Note: Must be HD44780 compatible character LCD
- ⚠️ Note: Not for graphical LCDs (Nokia 5110, TFT, OLED)
🎓 Multiple LCD Example
| Two LCDs on Same I2C Bus |
#include <Wire.h>
#include <LiquidCrystal_I2C.h>
// Two LCDs with different addresses
LiquidCrystal_I2C lcd1(0x27, 16, 2);
LiquidCrystal_I2C lcd2(0x26, 16, 2); // A0 closed
void setup() {
lcd1.init();
lcd1.backlight();
lcd1.print(“Display 1”);
lcd2.init();
lcd2.backlight();
lcd2.print(“Display 2”);
}
|
🔋 Power Consumption
| I2C Module Only |
~10-20mA @ 5V |
| 16×2 LCD Logic |
~1-3mA |
| 16×2 Backlight |
~50-120mA @ 5V |
| Total (I2C + LCD) |
~60-140mA typical |
| With Backlight Off |
~15-25mA only |
💰 Cost Analysis
| I2C Module Only |
$2-4 |
| 16×2 LCD (parallel) |
$3-5 |
| 16×2 LCD + I2C Module |
$5-8 total |
| Pre-Assembled Combo |
$6-10 (LCD + module soldered) |
| Value Assessment |
✅ Worth $2-4 for simplified wiring |
🔧 Technical Details
| PCF8574 Function |
8-bit I/O expander, converts I2C to parallel |
| I2C Speed |
100kHz (standard) or 400kHz (fast mode) |
| Address Bits |
3-bit address selection (A0, A1, A2) |
| Max Devices |
8 LCDs per I2C bus (with different addresses) |
| Pull-up Resistors |
Usually built-in on module (4.7kΩ typical) |
| LCD Update Rate |
Slightly slower than parallel (rarely noticeable) |
🎓 Common Use Cases
- 🤖 Arduino Uno Projects – Save precious GPIO pins (only 14 digital)
- 🏠 Multi-Room Displays – Multiple LCDs showing different info
- 📊 Data Logger – Multiple parameter displays on one bus
- ⚙️ Control Panels – Industrial/home automation interfaces
- 🌡️ Weather Stations – Indoor/outdoor displays on same I2C
- 🔬 Educational Kits – Simplifies wiring for beginners
- 💻 Raspberry Pi – Native I2C support, very easy
- 📦 Prototyping – Breadboard builds with minimal clutter
⚙️ Raspberry Pi Connection
| I2C Module Pin |
Raspberry Pi Pin |
Notes |
| GND |
Pin 6 (GND) |
Ground |
| VCC |
Pin 2 (5V) |
Power supply |
| SDA |
Pin 3 (GPIO 2) |
I2C data |
| SCL |
Pin 5 (GPIO 3) |
I2C clock |
| Enable I2C: sudo raspi-config → Interface Options → I2C → Enable |
🛡️ Product Information
✅ IIC/I2C LCD Adapter Module – Serial Interface for Character LCDs
✅ Main IC: PCF8574T or PCF8574AT I/O expander chip
✅ Interface: I2C/IIC two-wire serial communication
✅ Operating voltage: 5V DC (some support 3.3V-5V)
✅ Current draw: ~10-20mA module only (excludes LCD backlight)
✅ I2C address: 0x27 (PCF8574T) or 0x3F (PCF8574AT) default
✅ Address range: 0x20-0x27 (T version) or 0x38-0x3F (AT version)
✅ Address selection: A0, A1, A2 solder jumpers (3-bit addressing)
✅ Built-in features: Contrast potentiometer, backlight jumper control
✅ Connections required: Only 4 wires (VCC, GND, SDA, SCL)
✅ Compatible LCDs: 16×2, 16×4, 20×2, 20×4 (HD44780 character LCDs)
✅ Module size: ~42×19mm, Weight: ~3-5 grams
✅ GPIO pins saved: Frees up 4-14 pins vs parallel connection
⚠️ Important: Requires LiquidCrystal_I2C library (not standard LiquidCrystal). Default I2C address typically 0x27 or 0x3F – run I2C scanner to verify. Arduino Uno: SDA=A4, SCL=A5. Arduino Mega: SDA=Pin 20, SCL=Pin 21. Raspberry Pi: Enable I2C first in raspi-config. Adjust contrast potentiometer on module for proper display. Backlight jumper must be installed for backlight to work. Can control up to 8 LCDs on same I2C bus with different addresses. Keep I2C wire length under 1 meter for best reliability. Most modules have pull-up resistors built-in. Slightly slower than parallel (rarely noticeable for text display). Module plugs directly onto LCD 16-pin header. Some kits require header soldering. Power consumption: ~10-20mA module + LCD power. Compatible with Arduino, ESP32, Raspberry Pi, STM32, and most microcontrollers with I2C. Best investment: $2-4 saves significant wiring complexity!