Description
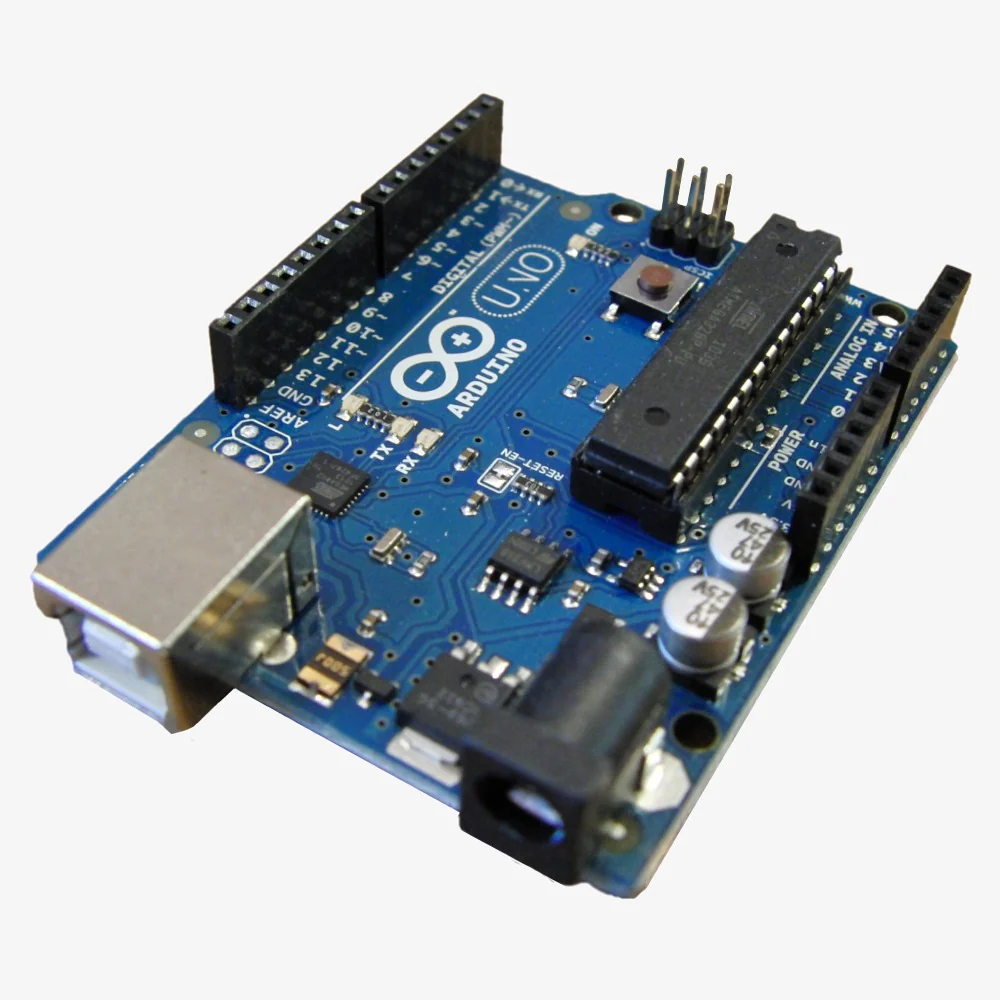
🔧 Arduino Uno R3 – ATmega328P Microcontroller Development Board
The Arduino Uno R3 is the world’s most popular microcontroller development board, providing an accessible platform for electronics prototyping, learning programming, and creating innovative projects. Based on the ATmega328P microcontroller, it features 14 digital I/O pins (6 with PWM), 6 analog inputs, 16MHz clock speed, and seamless USB programming. Perfect for beginners and professionals building robotics, home automation, IoT devices, and interactive installations.
✨ Key Highlights
- 💻 ATmega328P Microcontroller – Reliable 8-bit AVR processor
- ⚡ 16 MHz Clock Speed – Fast processing for real-time applications
- 🔌 14 Digital I/O Pins – 6 with PWM capability
- 📊 6 Analog Inputs – 10-bit ADC resolution (0-1023)
- 💾 32 KB Flash Memory – Ample program storage
- 🔗 USB Programming – Easy code upload via USB-B cable
- 🌐 Cross-Platform – Windows, Mac, Linux support
- 🛡️ Shield Compatible – Hundreds of expansion shields
- 📚 Huge Community – Millions of users worldwide
- 🔓 Open Source – Free hardware and software
📊 Technical Specifications
| Specification |
Details |
| 💻 Microcontroller |
ATmega328P (8-bit AVR) |
| ⚡ Operating Voltage |
5V DC |
| 🔋 Input Voltage (Recommended) |
7-12V DC |
| ⏱️ Clock Speed |
16 MHz |
| 💾 Flash Memory |
32 KB (0.5 KB bootloader) |
| 🧠 SRAM |
2 KB |
| 💿 EEPROM |
1 KB |
| 📌 Digital I/O Pins |
14 (6 PWM) |
| 📊 Analog Input Pins |
6 (10-bit ADC) |
| 💡 DC Current per I/O |
20 mA max |
| 🔌 USB Interface |
USB Type-B |
| 📡 Communication |
UART, I2C, SPI |
| 📏 Dimensions |
68.6mm × 53.4mm |
| ⚖️ Weight |
25 grams |
🎯 Perfect For
| Application |
Description |
| 🎓 Learning Programming |
Ideal for beginners learning embedded systems and C/C++ |
| 🤖 Robotics Projects |
Motor control, sensors, autonomous robots, robot arms |
| 🏠 Home Automation |
Smart lighting, temperature control, security systems |
| 📊 Sensor Monitoring |
Temperature, humidity, light, motion sensors, data logging |
| 💡 LED Control |
NeoPixel strips, LED matrices, displays, light shows |
| 🌐 IoT Development |
Internet-connected devices with WiFi/Ethernet shields |
🔧 Getting Started
| Step |
Action |
| 1. Download Software |
Get Arduino IDE from arduino.cc (free) |
| 2. Install Drivers |
Install CH340G drivers for clone boards if needed |
| 3. Connect Board |
Plug Arduino into computer via USB cable |
| 4. Select Board & Port |
Tools → Board → Arduino Uno, then select COM port |
| 5. Upload Code |
Load Blink example and click Upload button |
| 6. Verify |
Onboard LED should blink every second |
📦 Package Contents
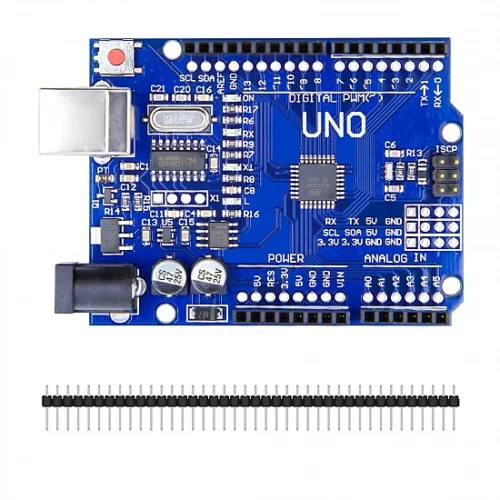
- ✅ 1x Arduino Uno R3 Development Board
- ✅ 1x USB A to USB B Cable
- ✅ Quick Start Guide (may vary)
- ⚠️ Note: Jumper wires, breadboard, sensors sold separately
✅ Key Advantages
| Feature |
Benefit |
| 🎯 Industry Standard |
Most widely used platform – millions of users |
| 📚 Massive Community |
Extensive tutorials, forums, troubleshooting help |
| 🆓 Open Source |
Free software, open hardware, no licensing fees |
| 🔌 USB Programming |
No external programmer needed – simple upload |
| 🛡️ Shield Ecosystem |
Hundreds of compatible expansion shields |
| 📖 Beginner Friendly |
Simplified C/C++ with easy learning curve |
⚠️ Important Notes
- ⚡ Current limits – Max 20mA per pin, 200mA total across all pins
- 🔌 Voltage protection – Never exceed 5V on I/O pins – causes permanent damage
- 💡 LEDs – Always use 220Ω-1kΩ resistors with LEDs
- ⚡ Motors/Relays – Use external power and transistors/MOSFETs for high current
- 🔋 Power – USB provides 500mA max – use 7-12V external for motors
- 💻 Pins 0 & 1 – Avoid during USB programming (used for serial)
🔋 Power Options
| Source |
Voltage |
Best For |
| USB (Computer) |
5V |
Programming, simple projects |
| 9V Battery |
9V |
Portable projects (optimal voltage) |
| 9V Wall Adapter |
9V |
Permanent installations |
| 7-12V Battery Pack |
7-12V |
Mobile robotics |
🔍 Troubleshooting
| Problem |
Solution |
| Board Not Detected |
Install CH340G drivers for clone boards |
| Upload Error |
Check board selection and COM port |
| Serial Monitor Blank |
Match baud rate in code and monitor |
| Pin Not Working |
Check wiring, test with simple digitalWrite |
💡 Pro Tips
- 📚 Start with examples – IDE includes built-in code for every function
- 🔍 Use Serial.print() – Debug code by printing variable values
- 💾 Comment code – Explain complex sections with // comments
- 🔌 External power for motors – Never run motors from USB power
- 📐 Breadboard first – Prototype before soldering permanent circuits
- 🛡️ Use a case – Prevent shorts on conductive surfaces
🛡️ Product Information
✅ Arduino Uno R3 – ATmega328P Development Board
✅ 14 digital I/O pins (6 PWM) + 6 analog inputs
✅ 16 MHz clock, 32 KB flash, 2 KB SRAM, 1 KB EEPROM
✅ USB programming – no external programmer needed
✅ UART, I2C, SPI communication protocols
✅ Cross-platform Arduino IDE (Windows/Mac/Linux)
✅ Shield compatible – hundreds of expansion options
✅ Open-source hardware and software
✅ Millions of users worldwide with extensive support
✅ Perfect for learning, prototyping, and production
⚠️ Important: Max 5V on I/O pins. Max 20mA per pin, 200mA total. Use external power (7-12V) for motors/servos. Install CH340G drivers for clones. USB provides 500mA max. Keep away from moisture.